Avoiding CPU Overhead in Unity by Replacing Cameras with Renderer Features
Intro
Today's article will be my second one based on my work on the Wavetale porting team - the first being about my screen gloom replacement. Unlike earlier articles I've written, this one is as much of a performance PSA as a behind the scenes look. Today's topic is a very common issue in Unity projects: excessive use of cameras.
The Goal
One of our biggest issues during the porting of Wavetale was the CPU overhead of the rendering. A large chunk of this turned out to be due to additional cameras used for rendering various elements to offscreen buffers. The issue here is not the time it takes to render the actual geometry, but rather the overhead incurred when switching between cameras. Luckily, most cameras can be removed by replacing them with custom render passes.
To clarify, we are not talking about virtual cameras such as those used by Cinemachine. We are specifically talking about Unity's built-in Camera class. Also, this is not about compromise; this is not about lowering graphical fidelity or changing render settings. This is about doing the same work and achieving exactly the same result, but with less overhead.
For reference, removing the three cameras described in this article resulted in 15ms(!) less CPU work per frame on our Switch version.
Cameras, render targets, and layers
Wavetale uses Unity with the Universal Render Pipeline (URP). While the examples and solutions we'll cover focus on Unity and URP the same problem exists when using other render pipelines as well. In fact, when holding the original presentation this article is based on, I was informed by a colleague that they've encountered similar issues with cameras in Unreal.
A scene in Unity can contain any number of cameras, a subset of which are active at any given time. Each camera contains a number of settings including which renderer to use and which layers to render. Layers are simply a way to group objects depending on what they represent or how they should be rendered. Each object must belong to some layer. Examples of layers in Wavetale are Ground, Water, Enemies, and Projectiles. In general it is important to make good use of layers to be able to optimize your scene rendering. The way Unity renders a scene is to go through each of the currently active cameras and, for each active camera, render all objects belonging to any of its selected layers.
So why would one want to create additional cameras beyond the main camera? Mainly, using a different camera allows you to render to separate render targets and use different layer culling. You can also attach a camera to any object in the scene to make it follow that object with no additional code. In our case the three removed cameras were each rendering one specific layer to a set of offscreen buffers which were then used as input in later draw calls.
The Problem
While cameras make it very easy to do offscreen rendering of select layers from a given perspective, they come with significant CPU overhead. You can see this in the profiler: when rendering a camera the CPU is busy "rendering" for a long time before any actual render passes begin.

Some overhead is naturally unavoidable. If you enable occlusion culling, this requires a fair amount of CPU calculations. You also need to bind render targets and update camera transforms. If you change layer culling mask you also need to do culling and sorting of game objects before rendering them. However, none of this explains this overhead. We did not use occlusion culling for any of the removed cameras and we still do the rest of this work manually in our replacement passes.
The Cameras
The three cameras which were replaced were
- Underwater Projection
- Drop Shadow
- Foam
Each of these cameras was replaced by a scriptable renderer feature which does two things
- Sets render target, camera transforms, culling settings, and sorting criteria.
- Calls URP's default rendering using
ScriptableRenderContext.DrawRenderers().
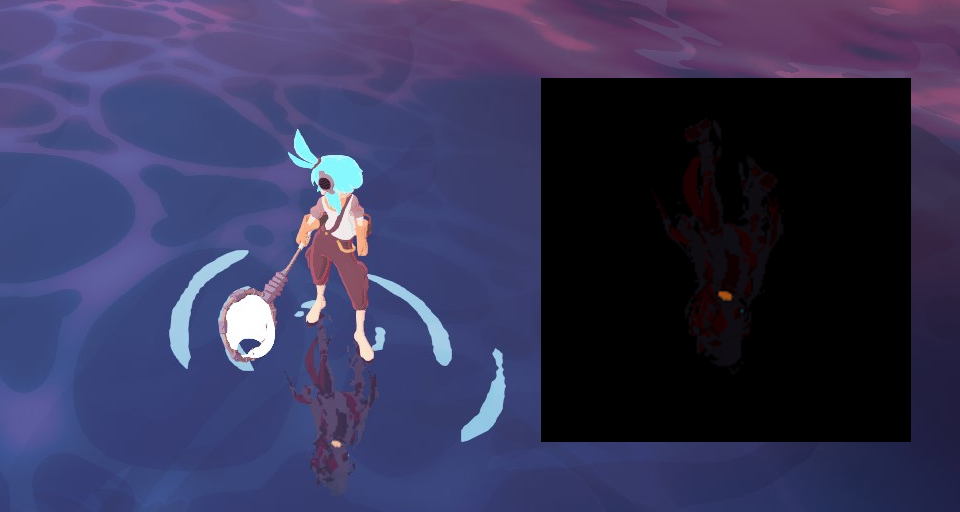
Underwater Projection
This camera renders "The Shadow", a mysterious character who is always following our protagonist beneath the waves. The result is later composited into the water surface. The Shadow is technically part of the player prefab, but part of a layer ignored by the main camera.
To replace the underwater projection camera I looked to URP's own Render Objects feature. This scriptable renderer feature renders to the camera's render targets. It allows you to override projection settings and set up layer filtering. Unfortunately, this filtering does not override layer culling. It can only be used to further narrow down the set of objects rendered, not select any which are culled by the camera. Additionally, this feature doesn't allow you to override render targets. It always renders to the camera's own render targets.
To fix this I made some modifications, extending the Render Objects feature to suit our needs. I added a checkbox for whether to temporarily override layer culling to match the filtering. I also added an optional render target override. The solution was simple and effective. I added an instance of this feature with the underwater projection layer selected and overrode the render target with the one used for the Shadow. That's it, one camera gone.
Drop Shadow
A drop shadow is a classic platformer trick. You always render a shadow directly underneath the player, regardless of whether it makes sense with your current scene lighting. This allows players to see where they'll land when jumping. This was implemented by first rendering the player from above to a single-channel offscreen buffer using an orthographic projection. Then, this offscreen buffer was rendered onto the ground with a decal shader.
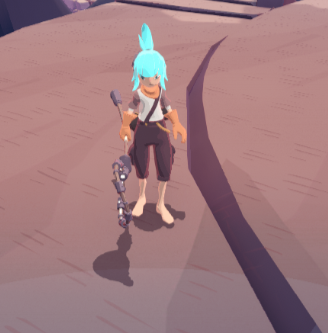
Note: In the end I decided to remove this first pass for the Switch version, using a simple oval instead of the player's actual contour. This saved a fair bit of render time and actually looks good enough that I don't expect most players to notice.
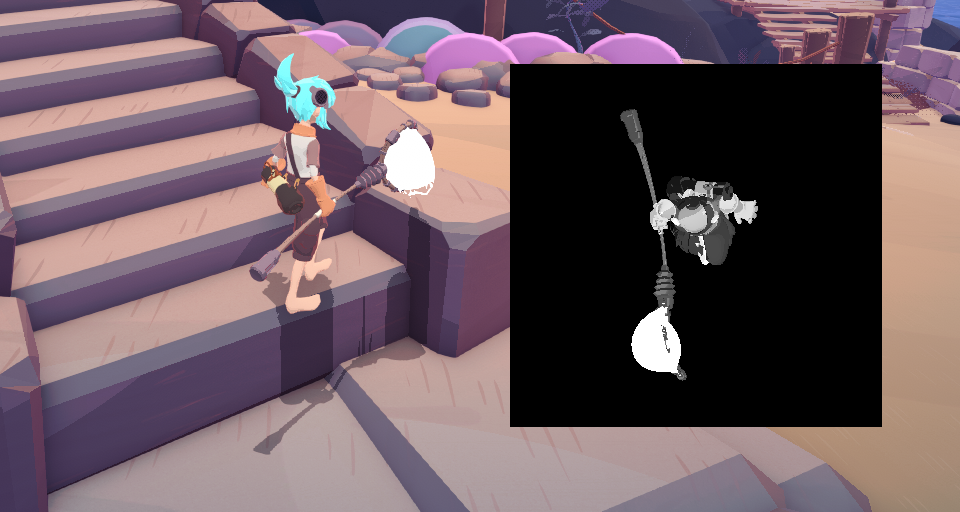
Originally, I replaced this camera the same way I had done with the Underwater Projection. In order to get the top down view centered on the player I simply used a custom shader which set up an appropriate view matrix. Since we weren't using any colour information in the later decal pass I simply output 1.0 to each pixel.
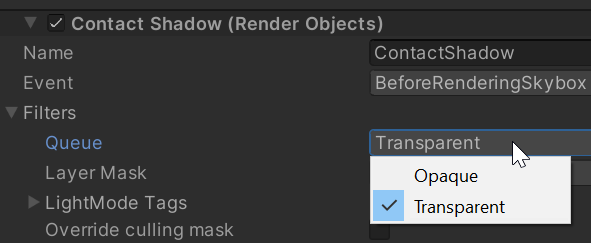
There was a problem, however. While the player character's body is opaque, her fishing net is transparent. Unity's Render Objects pass requires you to choose whether to render opaque or transparent objects. In order to work around this I extended the Render Objects feature once more, this time adding an option to select "Both" as render queue.
So now we're always rendering the shadow of the net, even when the net itself is invisible. Turns out, the net was always being rendered. However, the alpha was being set to 0 in the shader when a variable signified that the net was turned off. Since we override the shader we lose this logic. We could recreate the logic here, but this solution suddenly didn't feel so clean. I decided to come back to this later.
Foam
Our third and final camera was used to render foam on the water. More specifically, it renders a series of trails and rings on the water affected by player movement. It is another orthographic overhead view (like the drop shadow), rendered to an offscreen buffer, then composited into the water shader (like underwater projection).
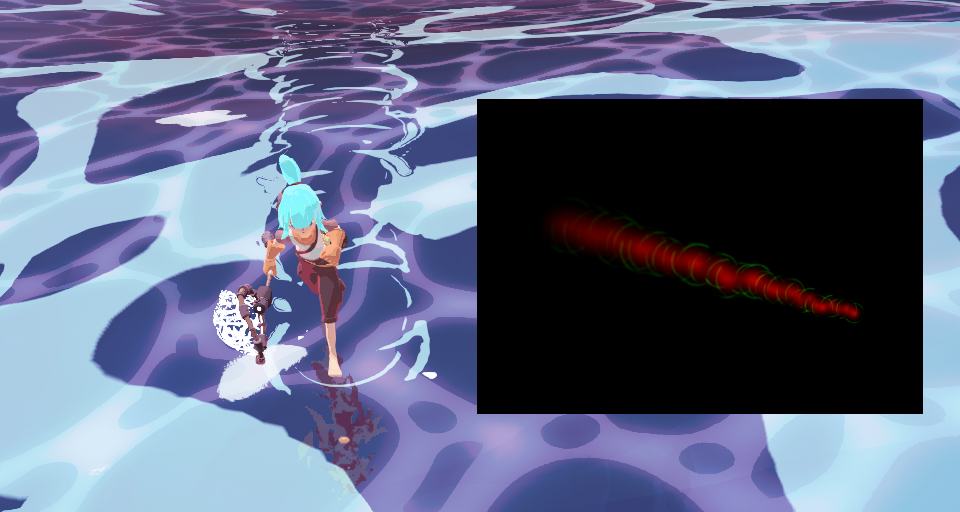
Looking at the foam camera it was clear this was the most complicated one to replace.
- It's using a different perspective from the main camera, so we cannot render it with the default transforms.
- This pass uses several different shaders with important logic and colour coded outputs, so we cannot override them with a single replacement.
- The water trails are made up of a mix of opaque and transparent objects.
To solve these issues I created a Player Topdown Feature. It is a stripped down and heavily modified version of the Render Objects feature which does the following:
- Fetches player position.
- Overrides camera view and projection matrices (
RenderingUtils.SetViewAndProjectionMatrices()). - Updates object culling and sorting (
CreateDrawingSettings()). - Handles both opaque and transparent objects in turn.
- Renders as usual (
ScriptableRenderContext.DrawRenderers()).
This makes for a renderer feature which is very simple to set up. Just specify the orthographic camera parameters, select render target, choose layers. Using it is a breeze and it allowed us to remove the final extra camera while retaining an identical* visual result.
* Or rather, it would have been, had I not spotted and fixed a bug caused by the original camera setup (the last bullet point in Gotchas, below).
Drop Shadow (take two)
Now that I had implemented the Player Topdown feature I could easily use it to replace my previous solution for the drop shadow. This solves the transparency issue in a clean way which gives identical results to the original camera solution. There was only one tiny bit of extra work needed: while the foam camera had a fixed orientation the drop shadow camera was parented to the player and as such was affected by the player's orientation. To fix this I simply added a checkbox for whether to use the entire player transform or just the position when setting up my view matrix.
When can cameras be removed?
I've spent a bunch of time thinking about this and as far as I can see it should be very rare to have a camera which cannot be removed. Using custom shaders or renderer features we can override some values, update matrices, change culling and sorting. That's basically all the work a camera does for us. So at what point is it no longer worth it? I don't know, I haven't reached it yet. I assume it might be tough to replace cameras used for full-fledged portals or picture-in-picture views. Especially if you need occlusion culling. But short of that, I currently don't see much of a reason to use more than a single camera in Unity.
Gotchas
While it's certainly worth the effort to go through your cameras and replace them, there are a few things you need to be wary of.
- Consider what shaders are used for any camera that's being replaced. You cannot override a shader if you depend on their logic.
- Shaders may read from built-in shader properties set by the camera. This is especially tricky with the built-in uniforms for inverse matrices (such as
UNITY_MATRIX_I_V). When callingSetViewAndProjectionMatrices(), the final argument to this function is whether inverse matrices should be updated or not. - Keep in mind whether the camera you are removing is using a perspective or orthographic projection.
- Is the camera parented to an object in the scene? If so, should its orientation depend on the orientation of said object?
- When overriding camera values: change them back after rendering! Anyone who's written their own OpenGL application pre 4.0 knows the pain of getting this wrong.
- Keep in mind that many cameras come with scripts attached which modify camera values (especially its transform).
- Different cameras can have different opaque/transparent sorting order. In fact, when replacing the foam camera I noticed it had a strange sorting order. Changing to default actually made it look as intended, fixing a subtle visual bug no one had noticed.
Conclusion
I hope this article has helped you see that most cameras can be removed for a nice performance boost without sacrificing visual fidelity. Whenever you consider adding a camera in Unity, instead think of how to do it without one. If you realise you already have extra cameras in your project, consider whether they can be removed.
About the author

Hello,
My name is Daniel "Agentlien" Kvick and I'm a Graphics Programmer with a passion for games.
I currently work as a Senior Software Engineer at 505 Games.
Here you'll find a selection of things I have worked on.